Thursday, August 27, 2015

Garbage Collection in JAVA

1) When the garbage collector runs, its purpose is to find and delete objects that cannot be reached.
 
2) The garbage collector is under the control of the JVM. The JVM decides when to run the garbage 
     collector.
 
3) An object is eligible for garbage collection when no live thread can access it.
 
4) Garbage collection cannot ensure that there is enough memory, only that the memory that is
    available will be managed as efficiently as possible.
 
5) The simplest way to ask (request) for garbage collection in System.gc();
 
6) About the only thing you can guarantee is that if you are running very low on memory, the garbage
    collector will run before it throws an OutOfMemoryException.
 
7) JAVA provides you a mechanism to run some code just before your object is deleted by the
    garbage collector. This code is located in a method named finalize() that all classes inherit from
    class Object.
    - For any given object, finalize() will be called only once (at most) by the garbage collector.
    - Calling finalize() can actually result in saving an object from deletion.
 
    For example, in the finalize() method you could write code that passes a reference to the object in
    question back to another object, effectively uneligibilizing the object for garbage colleciton.
 

Wednesday, August 26, 2015

Adding a column to a table in Hybris database

What will you do if you want to add a new column to a table in Hybris database?

Let us take an example of customerReview Table.

If you run the following query in Hybris console , you will get the default columns already available -


Now if you wish to add a new column say STANDING to this CUSTOMERREVIEW table, do the following -

1) Add the following code to commercefacades-beans.xml available in commercefacades extension, note here standing property of type string has been added to the already existing code.

<bean class="de.hybris.platform.commercefacades.product.data.ReviewData">
<property name="id" type="String"/>
<property name="headline" type="String"/>
<property name="comment" type="String"/>
<property name="rating" type="Double"/>
<property name="date" type="java.util.Date"/>
<property name="alias" type="String"/>
<property name="standing" type="String"/>
<property name="principal" type="de.hybris.platform.commercefacades.user.data.PrincipalData"/>
</bean>
 
 
2) Add the following code to customerreview-items.xml, available in customerreview extension. 

<attribute type="java.lang.String" qualifier="standing">
<description>
Standing will be decided based upon the no of reviews.
</description>
<modifiers initial="true" optional="false" />
<persistence type="property" />
</attribute>


3) Run Ant Clean All and start the hybris server.


4) After this all the Data and Model files related to the newly added property (standing) will be created automatically, you can verify this by opening the following files -> CustomerReviewModel and ReviewData.


5) Go to Admin Console -> Platform -> Update and click on Update Button.


6) Now if you again run the select query, you will find the newly added column :)


In this way you can modify the tables and include your own columns if you want to implement some customized logic.

You can also experiment and add a completely new table to the database.

Monday, August 17, 2015

Memory management in JAVA

Sometimes when you run some java applications you may run out of memory and get exceptions related to memory.

Following code helps you to manage the memory better. Also you may trigger an email to the users or dvelopment team whenever you anticipate shortage of space, so that the development team can take necessary action.

public class MemoryUsage
{

  public static void main(final String[] args)
  {
   final int mb = 1024 * 1024;

   final Runtime runIns = Runtime.getRuntime();
   
   System.out.println("Total Memory = " + runIns.totalMemory() / mb + " mb");
  
   System.out.println("Free Memory = " + runIns.freeMemory() / mb + " mb");
   
   System.out.println("Used Memory = " + (runIns.totalMemory() - runIns.freeMemory()) / mb + " mb");
  
   System.out.println("Max Memory= " + runIns.maxMemory() / mb + " mb");
  }

}

Sunday, August 16, 2015

Move zeroes (0's) to the end of array list

In a arraylist if you have zeroes (0's) at any randon location and want to move all the zeroes to the end of the list keeping the sequence of the list as-is, here is the solution -

Input - 1 9 8 4 0 0 2 7 0 6 0 9

Output - 1 9 8 4 2 7 6 9 0 0 0 0

void puchEnd()
{
   int count = 0;

   //Traverse the list and if element is non-zero, write to the list.
   for(int i=0 ; i<arr.length; i++)
  {
      if(arr[i].equals("0"))
      {
          //do nothing
      }
      else
      {
          arr[count++] = arr[i]; 
      }
  }
  
   //After writing all non-zero elements, now copy zero till the end of list.
   while(count < n)
   {
      arr[count++] = arr[i];
   }
}

JDBC Steps

1) Load the driver class.
    Class.forName("oracle.jdbc.driver.OracleDriver");


2) Create the connection Object.
    Connection con = DriverManager.getConnection  
    ("jdbc:oracle:thin:@localhost:1521:xe","system","oracle");


3) Create the statement Object.
     Statement stmt = con.createStatement();


4) Execute query.
     ResultSet rs = stmt.executeQuery("select * from emp");
     
     while (rs.next)
     {
        System.out.println(rs.getString());
     }


5) Close the conneciton Object.
     con.close();

Wednesday, August 12, 2015

Steps to setup Hybris for the first time

1) Download the latest version of hybris from wiki-hybris.

2) Unzip the hybris multi-channel suite.

3) After unzipping the files, open command prompt and go to this path - hybrisfolder > bin >    
    platform.

4) First we need to set-up ant, so type the following command - setantenv.bat

5) Now build your hybris suite - ant clean all

6) After successful build config folder will be created in your installed hybris directory where it  
     contains 2 important files - local.properties and localextensions.xml

7) Now start the hybris server - hybrisserver.bat

 8) Now type http://localhost:9001/ in the browser.

 9) You now have to click on initialize available under platform > initialization tab, this will
     automatically create all the data required to launch a  ecommerce website as well as the hybris
     management console (hMC) from where you can  control the  data displayed on the website.


10) It takes around 2 hours to complete the initialization process.

11) Now type http://localhost:9001/yacceleratorstorefront?site=electronics in the browser.

12) Ecommerce website will open-up as shown below.


13) This is the default ecommerce website which comes out-of-the box in hybris.

14) You can now mould this website as per the client requirements.

15) Hybris creates 1 more site by default, you can access this by typing
      http://localhost:9001/yacceleratorstorefront?site=apparel in the browser.

16) To open hMC type http://localhost:9001/hmc in the browser.


17) Type username / password as admin / nimda.

18) Hybris Management Console (hMC) will open up, where you can control the data (products,
       price, available quantity etc) displayed on the website.


How to Import / Build Hybris in Eclipse

1) Suppose you want to work on ycommercewebservices.

2) Import ycommercewebservices , platform and config folders in eclipse.

3) Now open the extensioninfo.xml file of ycommercewebservices as shown below.


4) Import all the extensions in eclipse which are shown in "requires-extension" attribute as shown below.


5) Repeat step 3 and step 4 for the newly added extensions, till all dependencies are resolved.

6) You will have the following extensions in eclipse at the end. 


7) Build the code in eclipse (Project -> Clean).

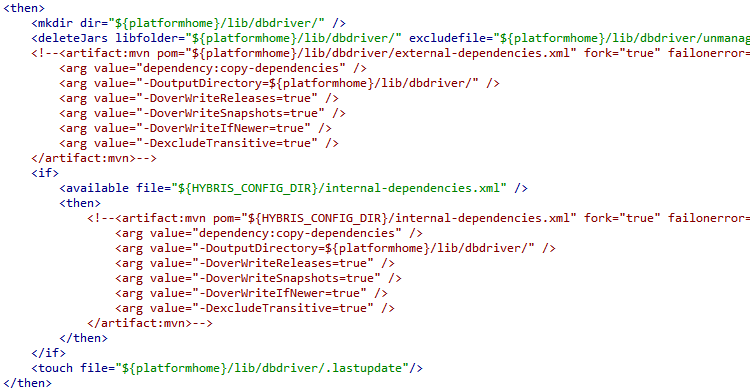
8) If you get any maven related errors, comment the following lines in maventasks.xml file.


9) Build the code again, you will get build successful message.

10) All the Data and Model files will be generated in platform/bootstrap folder.


Monday, August 10, 2015

Why do we need Design Patterns

You can exploit the wisdom and lessons learned by other developers who have been down the same design problem road and survived the trip.

Instead of code reuse, with patterns you get experience reuse.

Design Patterns give you a shared vocabulory with other developers. Once you have got the vocabulory you can more easily communicate with other developers.

Patters allow you to say more with less.

Design Patterns help you to think - how to create flexible designs that are maintainable and that can cope with change.

You need to know about atleast the following Design Patterns other than MVC :)
  1. Strategy
  2. Observer
  3. Adapter
  4. Facade
  5. Factory
  6. Template
  7. Singleton
  8. Proxy
  9. Decorator
  10. Builder

Friday, August 7, 2015

Authentication and Cart Functionality in Hybris via Webservices

Imagine a scenario when you want a third party application to be in sync with your Hybris application (this may also be a mobile app).

Products ordered in one application should also be visible in the second application.

This scenario can be easily achieved by using webservices which are provided by Hybris OOTB (Out-Of-The-Box).


Steps->

1) If we login to the webportal for the first time, we can see that the cart is empty.


2)      Now logout from the portal.

3)      Now we can add products to the cart by using the below web-services.

4)      //webservice for authentication
http://localhost:9001/rest/oauth/token?client_id=mobile_android&client_secret=secret&grant_type=password&username=hrishikesh.maluskar@igate.com&password=Aug@2015

After you run the above webservice, you get the following output ->
{
  "access_token": "7bd2b9a2-24d6-4939-9c8f-d98b4e464b6a",
  "token_type": "bearer",
  "refresh_token": "efaf6ed2-746e-4263-93dd-f37e485ded7f",
  "expires_in": 17571
}

You need to add this token in the header of RestClient as shown below.


5)      //get the current logged in user
https://localhost:9002/rest/v1/electronics/customers/current

6)      //get the current session cart
http://localhost:9001/rest/v1/electronics/cart

7)      //add to cart
http://localhost:9001/rest/v1/electronics/cart/entry?code=107701&qty=2

8)      //logout current user
http://localhost:9001/rest/v1/electronics/customers/current/logout

9)      Now if you go to the webstore, you will see the product gets added to the cart as shown below.


Note: You can also add the header in your JAVA code as shown below.

WebResource webResource = client.resource(your-webservice);
webResource.header("Authorization", "bearer 7bd2b9a2-24d6-4939-9c8f-d98b4e464b6a")


Wednesday, August 5, 2015

Parse Nested JSON in JAVA

Sample JSON file ->

--------------------------------------------------------------------------------------------------------------------------
{

"products": [

{

"summary": "Flagship tripod with remote control and pan handle – designed for professionals!",

"averageRating": 4.555555555555555,

"stock": {

"stockLevelStatus": {

"code": "inStock",

"codeLowerCase": "instock"

}

},

"description": "Remote pan-handle with under-hand grip controls zoom in/out, record start/stop, photo mode on/off (camcorder only) Dimensions: maximum height approx. 1,505 mm Dimensions: minimum height approx. 735 mm Weight: approx. 3.2 kg Maximum Load: 5.0 kg Panning Angle: 360 degrees Tilting Angle: 90 degrees down / 70 degrees up Quick-release Mounting Shoe Ball level for quick and easy level adjustment Oil Friction Head ...",

"name": "Flagship tripod with remote control and pan handle",

"availableForPickup": true,

"code": "23355",

"url": "/Open-Catalogue/Cameras/Camera-Accessories-%26-Supplies/Tripods/Flagship-tripod-with-remote-control-and-pan-handle/p/23355",

"priceRange": {},

"price": {

"currencyIso": "USD",

"priceType": "BUY",

"value": 580.38,

"formattedValue": "$580.38"

},

"manufacturer": "Sony",

"volumePricesFlag": false,

"images": [

{

"imageType": "PRIMARY",

"format": "thumbnail",

"url": "/medias/?context=bWFzdGVyfGltYWdlc3wyNDA3fGltYWdlL2pwZWd8aW1hZ2VzL2hkYi9oNzIvODc5NjIzNzEzNTkwMi5qcGd8YTE0YmM0NzE4NzAyZjVlNDcwYWY5NzdjZTA1MzlmMWVkMzYwZWU1ZDA0OGY3MWY1MTdkYzNjMGJhMTk4NTBhMA"

},

{

"imageType": "PRIMARY",

"format": "product",

"url": "/medias/?context=bWFzdGVyfGltYWdlc3wxMTg0NnxpbWFnZS9qcGVnfGltYWdlcy9oNDMvaDY1Lzg3OTYyMTA3OTA0MzAuanBnfDhhNzM5YThjMTYzZmU0OWIyYWQ0Mjg0OWZhYWQ1MmMwM2U2N2RmYzE4NDFmN2RjOWE1YTYzNmQyNmQ3NzNhZDk"

}

]

}

]

}

--------------------------------------------------------------------------------------------------------------------------

JAVA Code->

Here JSON data can be fetched by storing it in a file or directly through the url (exposed via web-service).

--------------------------------------------------------------------------------------------------------------------------
package com.parseProduct;

import java.io.FileReader;
import java.io.IOException;
import java.net.URL;
import java.util.Iterator;
import java.util.Scanner;

import org.json.simple.JSONArray;
import org.json.simple.JSONObject;
import org.json.simple.parser.JSONParser;

public class ParseFinal {

public static void main(String[] args) throws IOException {

JSONParser parser = new JSONParser();

String s = "
http://localhost:9001/rest/v1/electronics/products";

URL url = new URL(s);

Scanner scan = new Scanner(url.openStream());
String str = new String();
while (scan.hasNext())
str += scan.nextLine();
scan.close();

try
{
Object obj = parser.parse(str);

JSONObject jsonObject = (JSONObject)(obj);
JSONArray slideContent = (JSONArray) jsonObject.get("products");

Iterator i = slideContent.iterator();

while (i.hasNext())
{
JSONObject slide = (JSONObject) i.next();
String summary = (String)slide.get("summary");
double averageRating = (double)slide.get("averageRating");

JSONObject stockObj1 = (JSONObject) slide.get("stock");
JSONObject stockoo = (JSONObject) stockObj1.get("stockLevelStatus");
String code = (String)stockoo.get("code");
String codeLowerCase = (String)stockoo.get("codeLowerCase");

String description = (String)slide.get("description");
String name = (String)slide.get("name");
boolean availableForPickup = (boolean)slide.get("availableForPickup");
String productCode = (String)slide.get("code");
String productUrl = (String)slide.get("url");


JSONObject stockObj = (JSONObject) slide.get("price");
String currencyIso = (String)stockObj.get("currencyIso");
String priceType = (String)stockObj.get("priceType");
double value = (double)stockObj.get("value");
String formattedValue = (String)stockObj.get("formattedValue");

String manufacturer = (String)slide.get("manufacturer");
boolean volumePricesFlag = (boolean)slide.get("volumePricesFlag");

JSONArray jsonImage = (JSONArray) slide.get("images");

System.out.println("\n"+"summary:"+summary);
System.out.println("\n"+"averageRating:"+averageRating);
System.out.println("\n"+"stock:"+"stocklevel status:");
System.out.println("\n"+"code:"+code);
System.out.println("\n"+"codeLowerCase: "+codeLowerCase );
System.out.println("\n"+"description:"+description);
System.out.println("\n"+"name:"+name);
System.out.println("\n"+"availableForPickup :"+availableForPickup );
System.out.println("\n"+"productCode :"+productCode);
System.out.println("\n"+"productUrl :"+productUrl);


System.out.println("\n"+"currencyIso:"+currencyIso);
System.out.println("\n"+"priceType:"+priceType);
System.out.println("\n"+"value:"+value);
System.out.println("\n"+"formattedValue:"+formattedValue);
System.out.println("\n"+"manufacturer:"+manufacturer);
System.out.println("\n"+"volumePricesFlag:"+volumePricesFlag);

System.out.println("*************************************");
}
}
catch (Exception e)
{
e.printStackTrace();
}
}
}

--------------------------------------------------------------------------------------------------------------------------
Home